Knowledge
Elevations
Compelete Guide to Elevation Drawing
Part 1: What Is an Elevation Drawing?
When you want to see how the structure of your fully constructed building would look like, it is an elevation drawing that you may want to look for. The well-prepared elevations give the walls of your home a decent look, and a neat diagram allows you to have a clear idea of what kind of appearance you can expect from the erection once it is complete.
Elevation diagrams are mostly drawn to show a side of the house after its completion. In general, it is the front of the building an elevation map is created for, and it illustrates the height, length, and width of that side. When drawn for the interiors, the design also shows where the other objects such as the shelves, cabinets, wardrobes, along with the windows and doors would be placed on the wall, and how the overall view of the structure would come up after the construction work is complete. Further, if you own a place at the corner of a road, you may want to have two elevations, one for each side.
Part 2: Purpose and Benefit
As mentioned earlier, the main purpose of preparing elevation diagrams is to see how the exterior or interior of the actual elevations of a building would look when seen from the front. Since the diagrams of the elevations are merely the illustrations that are drawn before implementation, any changes that you might want to have in the final structure could be made in the drawing itself to help the architects understand your idea.
The benefit of having the designs of elevations is that you can modify the look of the front, or any other side, of your building. For example, when an elevation drawing is available, you can change the position of the windows, height and placement of the doors, location of the shelves or cabinets in case of interiors, etc., and give your home or office an entirely new look altogether.
Part 3: Elevation drawing Symbols
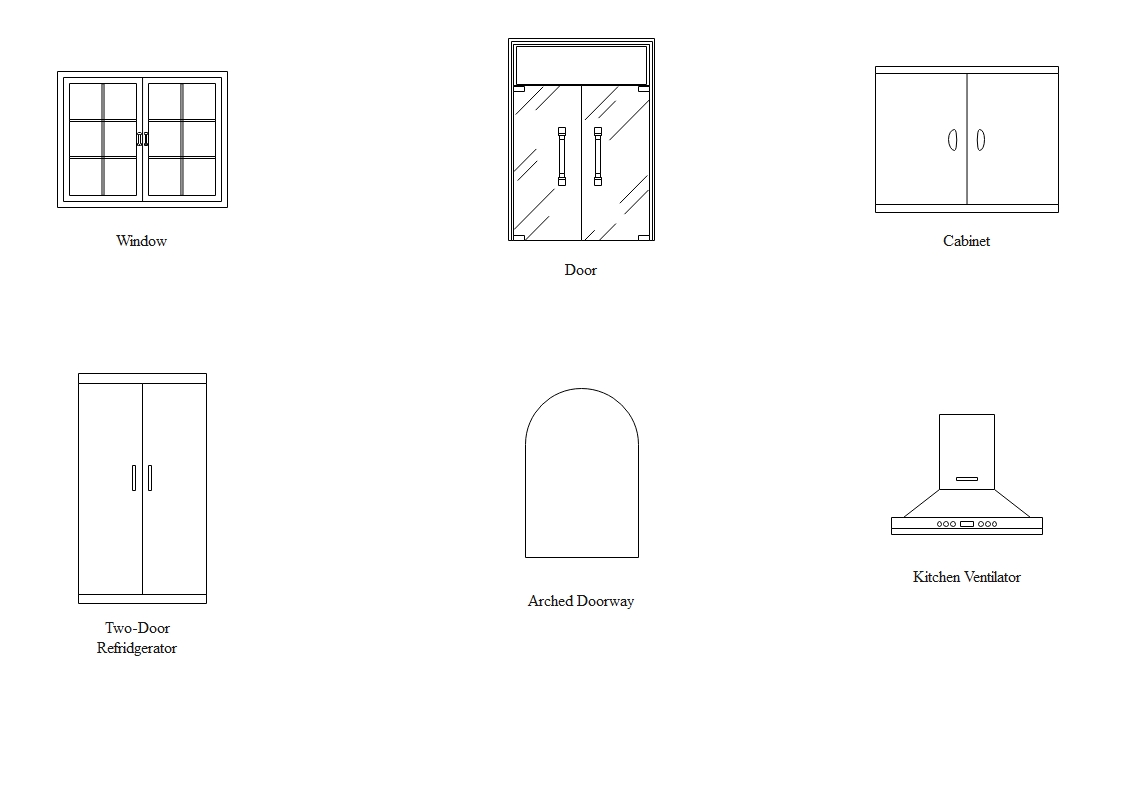
Although there are several symbols and icons that are used to prepare the diagram for the elevations and each building may have varied illustrations, some of the most common shapes are shown in the following image:
Part 4: What to Do Before Creating Elevation Drawing?
Even though the elevations can be modified in their illustrations before they are constructed, having a design in mind before drawing them in the first place is equally imperative. A few key points that you must consider before creating an elevation diagram include:
Dimension Assessment
Assess the height, width, and length of the walls you are planning to draw the diagrams of the elevations. This would help you come up with a precise plan that would be easy to refer to and follow.
Size of Objects
Make sure to get a clear measurement of the objects such as windows, doors, cabinets, etc. so you can place them at the right position on the elevation diagram for better understanding.
Keep Plumbing and Electric Switches in Mind
While preparing the drawing of the elevations, make sure to take the plumbing systems and electrical switchboards into account so they are not messed up in the final construction.
Use Applications
Rather than drawing the map of the elevations manually, it is advisable to use an efficient PC application such as EdrawMax by Wondershare so you can expedite the entire creation process, and have access to the industry-standard shapes and icons that are recognized by most professional architects and designers.
Part 5: How to Make Elevation Drawing in EdrawMax?
Wondershare EdrawMax has several built-in categories for almost all types of industries. This also includes building plans and elevations. Furthermore, each category has many templates along with their corresponding libraries that are again populated with domain-specific symbols in the form of vector shapes to help you prepare the charts, diagrams, and designs quickly and easily.
EdrawMax
All-in-One Diagram Software
Create more than 280 types of diagrams effortlessly
Start diagramming with various templates and symbols easily
-
Superior file compatibility: Import and export drawings to various file formats, such as Visio
-
Cross-platform supported (Windows, Mac, Linux, Web)
Learn How to Draw Elevation from Floor Plans
With that being said, the simple instructions that follow enable you to draw a full-fledged elevation drawing using the application:
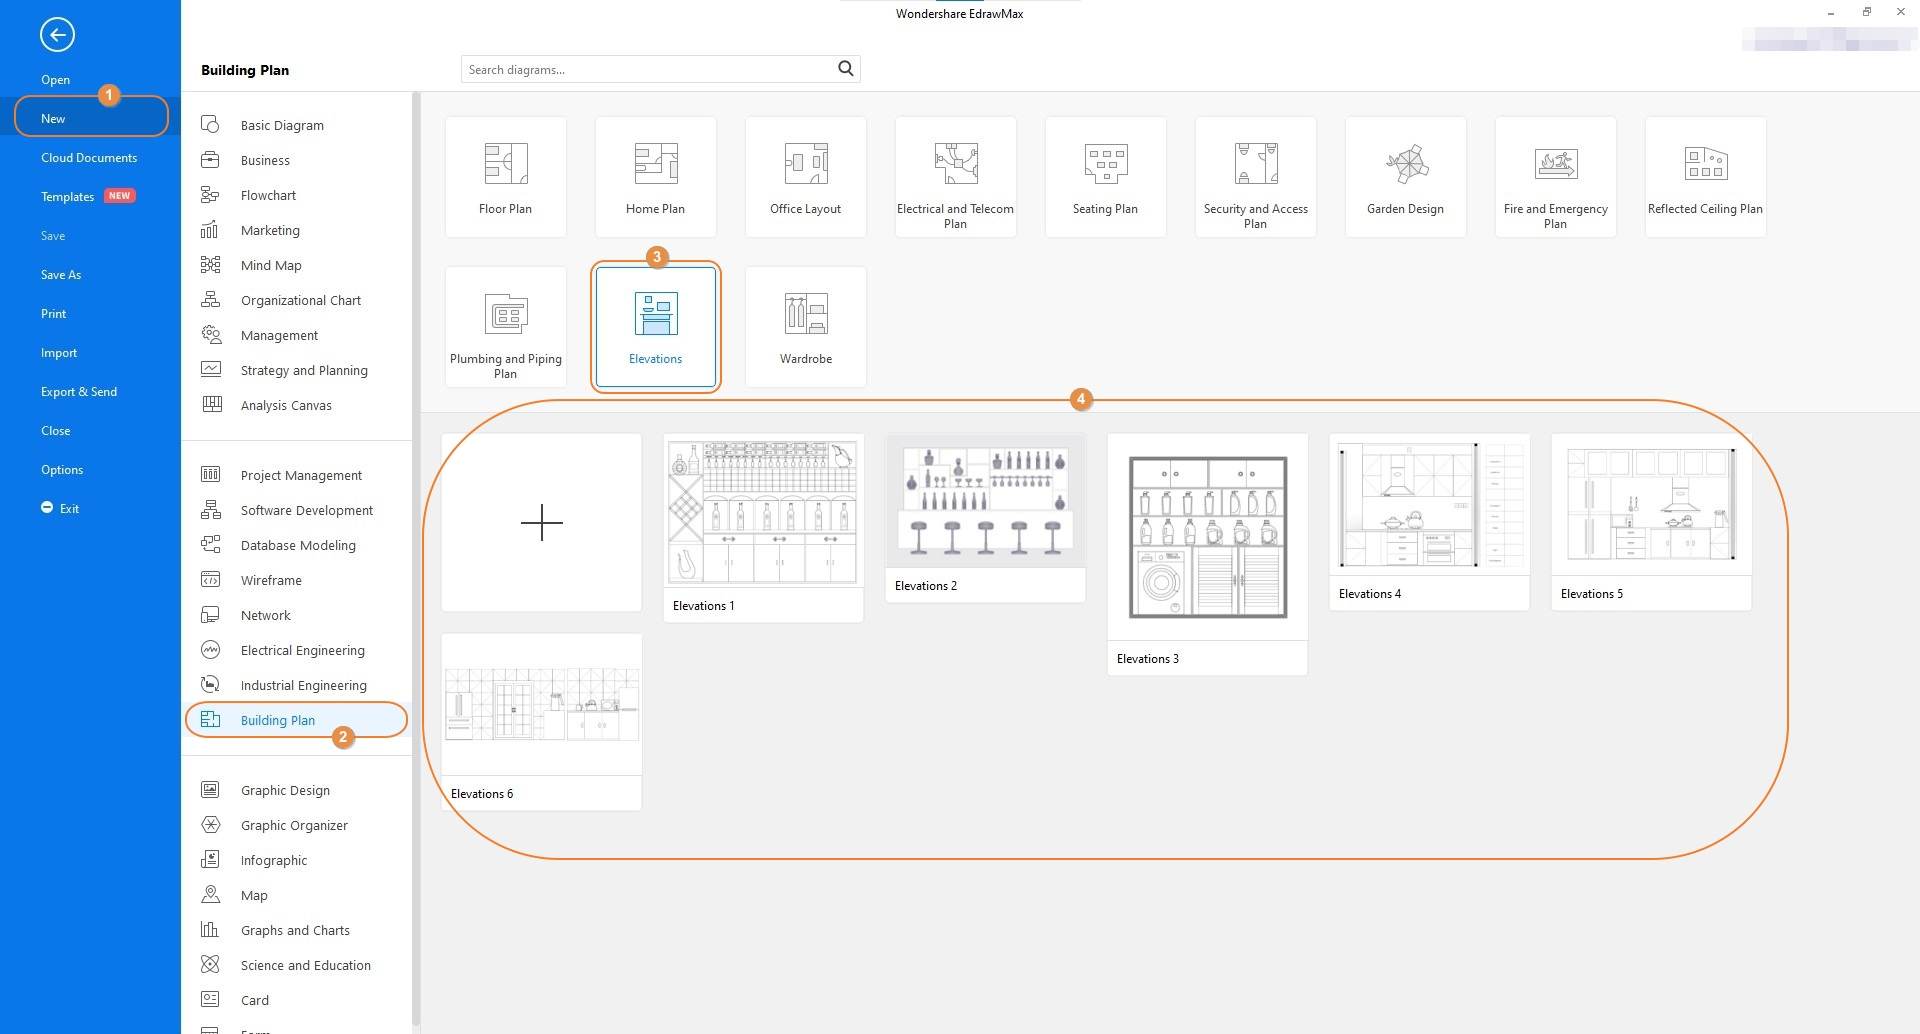
Step 1: Choose a Relatable Template
After opening Wondershare EdrawMax on your computer, confirm that New is selected in the left pane, and select the Building Plan industry from the one at the center. Now click the Elevations category from the upper row of the right window, and pick your preferred template from the lower section. Make sure to choose a template that is closest to the design you are planning to have for your building.
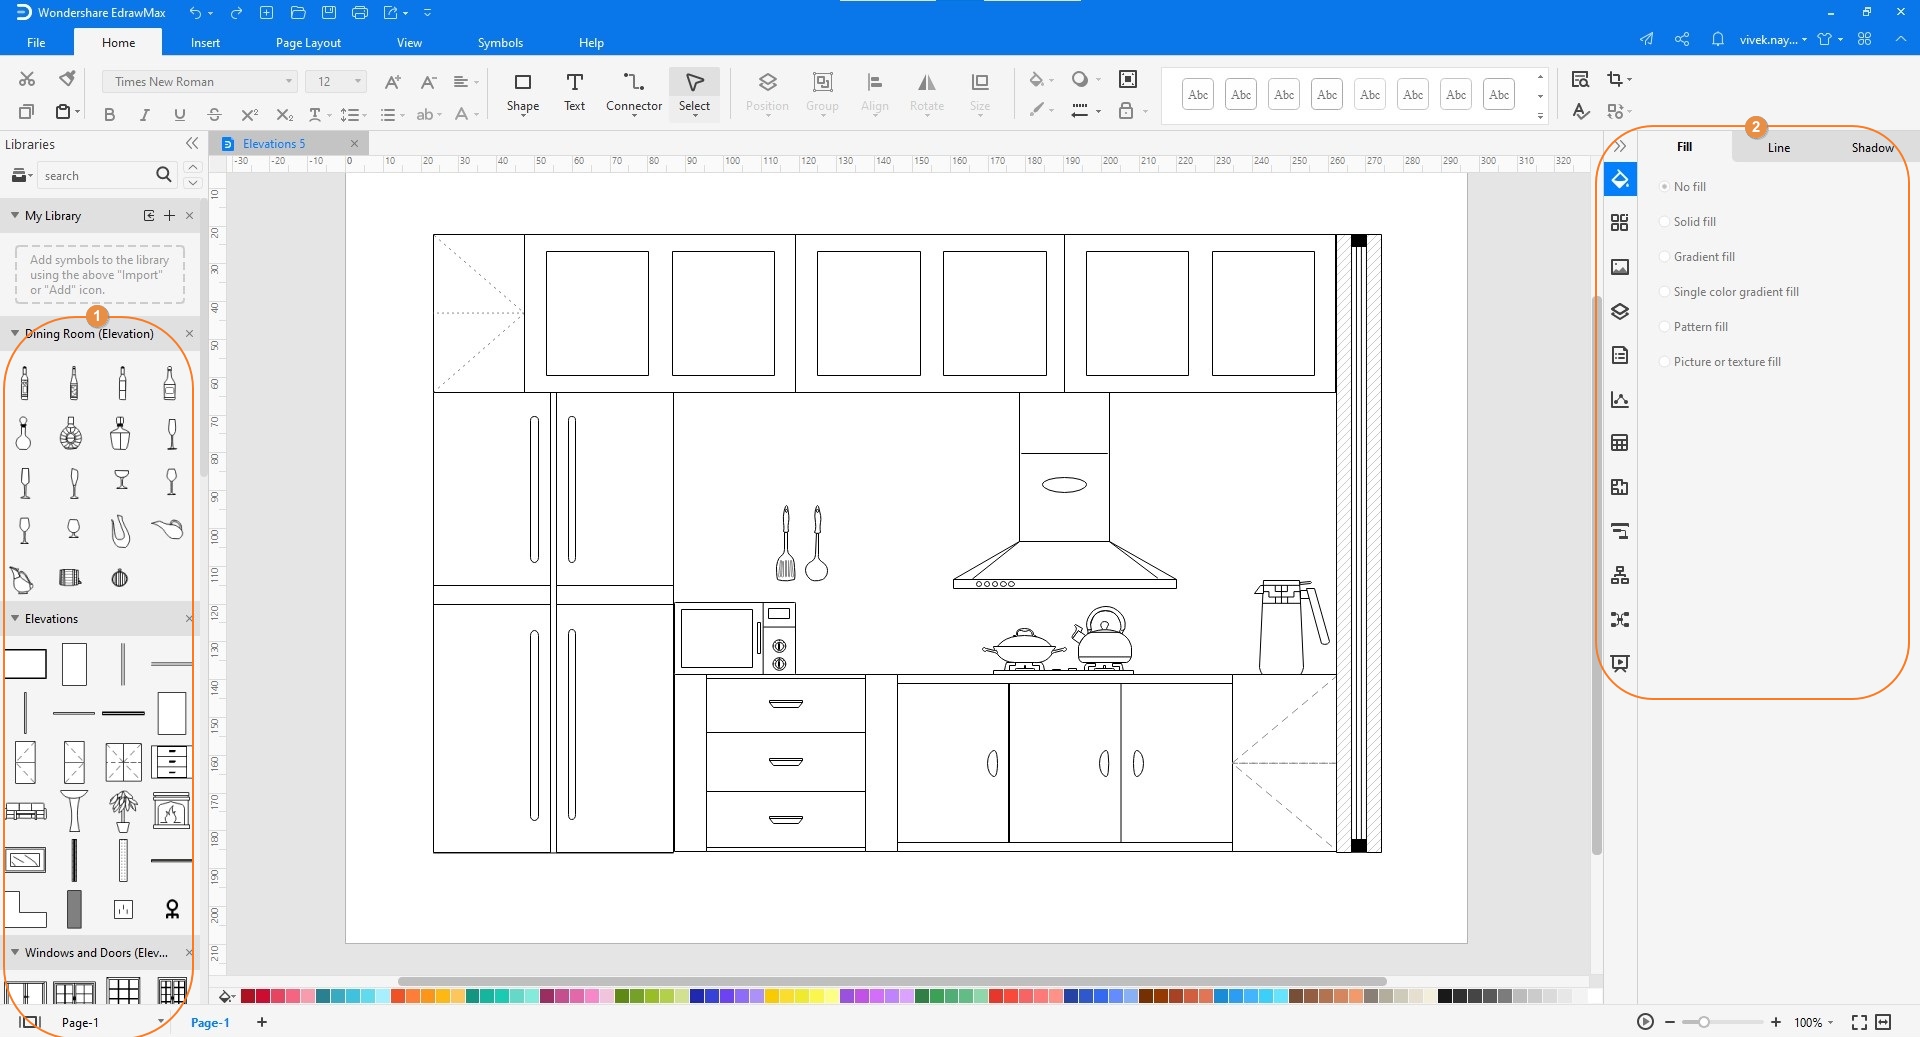
Step 2: Make Necessary Changes
Click and drag a symbol from the libraries on the left to the Canvas to add another object to the elevation that you believe is missing. Repeat this process until you are satisfied with the final design. Next, use the tools present on the right to decorate the shapes so they are easily identifiable.
Step 3: Make Necessary Changes
Click and drag a symbol from the libraries on the left to the Canvas to add another object to the elevation that you believe is missing. Repeat this process until you are satisfied with the final design. Next, use the tools present on the right to decorate the shapes so they are easily identifiable.
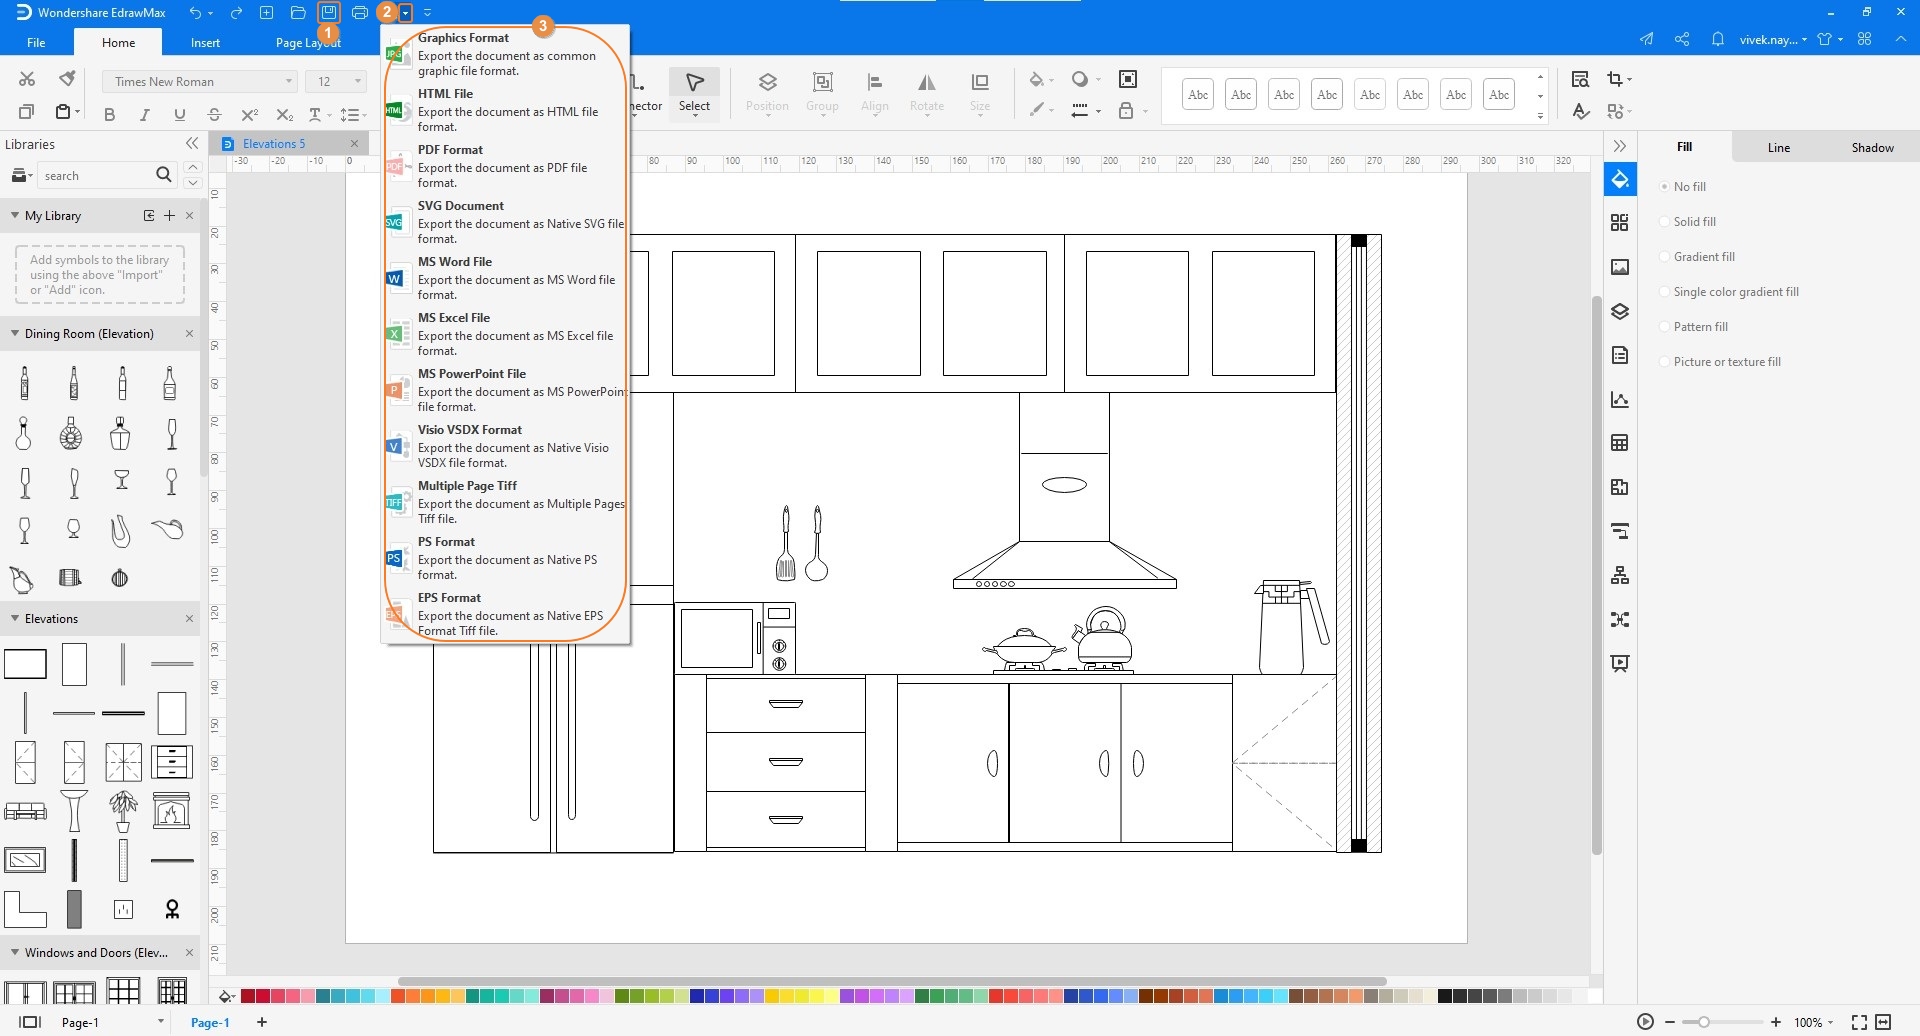
Step 4: Save and Export the Map
Click the Save icon from the top-left corner of the window to save the EdrawMax project file on your PC. After this, click the More button on the Export icon, and choose a format of your preference to export the final diagram to.
Part 6: Tips for Making Elevation Drawing
Some pro tips that might come in handy while preparing a diagram for elevations include:
Keep the diagram less congested
Make sure to consider the position of the power and water outlets in mind while preparing an elevation drawing
Feel free to make any changes or adjustments to the objects that are to be placed on the elevation
Try making the diagrams for the elevations for all the walls that need special attention or are there for decorative purposes
Keep in mind that elevation diagrams are not only for exterior walls but are also prepared for the interiors where the key objects like cabinets, wardrobes, etc. are to be added
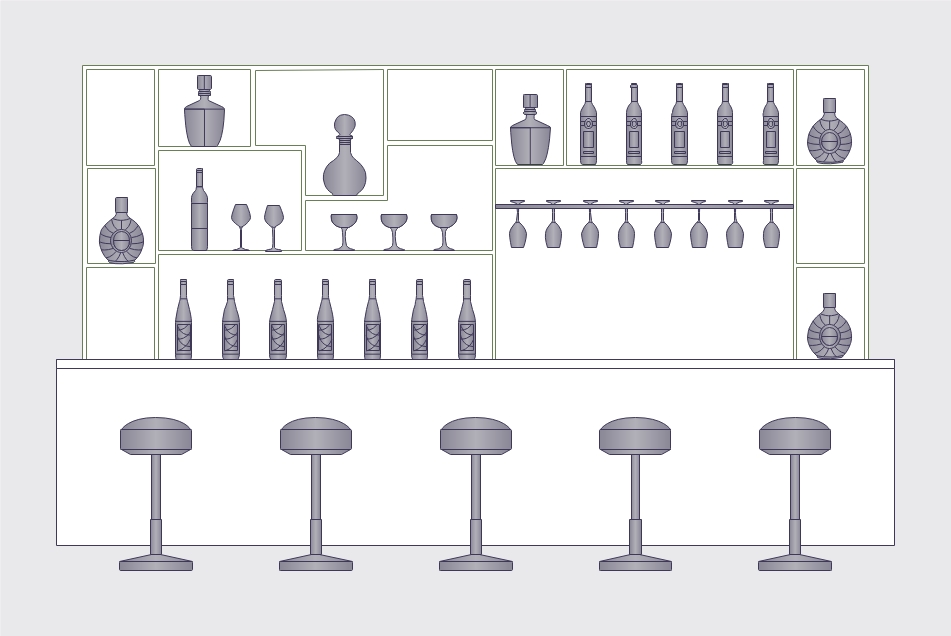
Example
The above image is a simple diagram for a bar where the front elevation has all the necessary items such as various types of glasses, variety of liquor, etc. along with how the serving table would be placed in alignment with the wall. The barstools are placed to give the illustration a realistic look, and also to suggest how to decorate the bar once it is complete.
Part 7: Conclusion
The elevations must be decorated carefully in order to give the interior and exterior of your building a decent and attractive look. Therefore, having an elevation drawing before starting with the construction part is imperative as it enables you to introduce any changes at the beginning itself, and makes it easy for the architects and designers to understand your view as well. To expedite this task, you are strongly suggested to use an efficient tool like Wondershare EdrawMax that is also helpful in eliminating any human errors that you may otherwise come up with if the maps are drawn manually.
Related Articles